UPDATE: This video was made to share a unique way of creating a gear in Illustrator. This is not the best method for creating a gear, but is an interesting lesson on how to use the transform effect.
There are many ways to achieve this and alternatively here's a video by "askbrianwood" that shares a very effective method on how to create a gear: http://www.youtube.com/watch?v=chl4OGi5VNwThanks for watching!
I've always been fascinated with the design of a gear. For years I've been making them, but not in any efficient way whatsoever. So today I'd like to show you step by step, how to create a vector gear in Illustrator. If you prefer a written tutorial, continue reading...
Let's begin
To create this vector gear, we'll be using some basic shapes combined with one main effect. So let's begin!
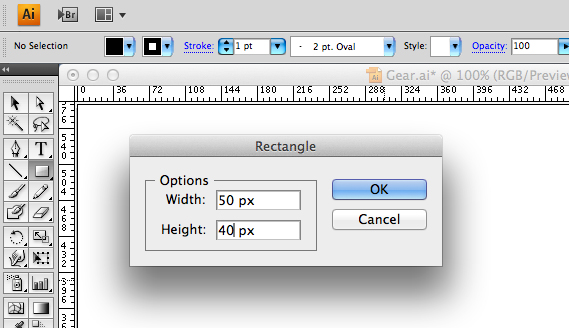
Open up a new web document in Illustrator, grab the Rectangle Tool (M) and click once on the canvas. When you click once with the rectangle tool, you should see the Rectangle Option box. Create a 50x40px black box without any stroke, then click OK.
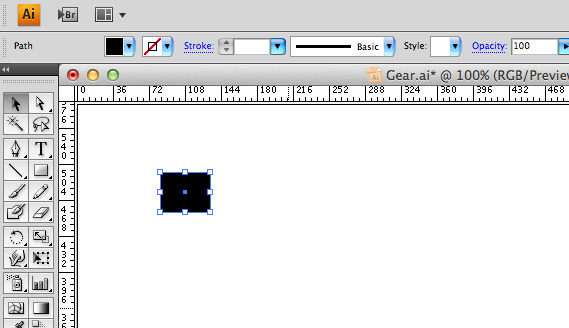
To make our gear not look so bland, let's make the cogs look a bit more interesting: Use the Direct Selection Tool (A) to select the top right corner of the box and go in left 10px (A quick way to jump 10px is by holding the Shift key then pressing the direction you'd like the point to go).
Do the same to the top left corner so that your box looks like the one shown above.
After you've brought each top corner in 10px, use the Selection Tool (V) and rotate the new cog 90 degrees clockwise.
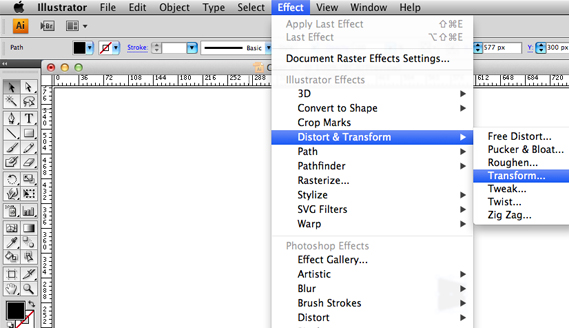
Now that we have our first cog finished, let's use this main effect to create the rest of our cogs: With the single cog selected, go to the menu above and select Effect > Distort & Transform > Transform...

Now that you see the Transform Effect box, first thing you want to do is check the Preview box so we can see the changes to our effect before we commit.
For this specific gear, we want 9 Copies of the cog. If you'd like more or less, feel free to play around with the settings.
Next we want to Move the cog copies: Horizontal -30px and Vertical 80px
Finally, Rotate the copies by 40 degrees and click OK.
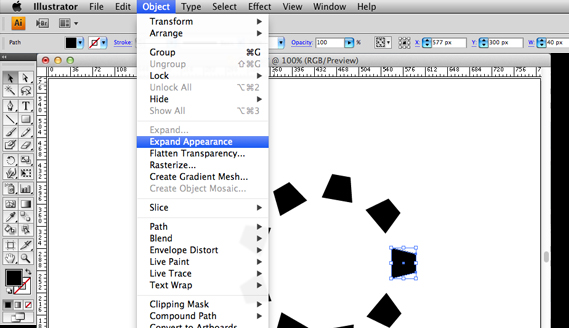
Next we want to make each cog it's own object, so with your gear selected - go up top and click Object > Expand Appearance
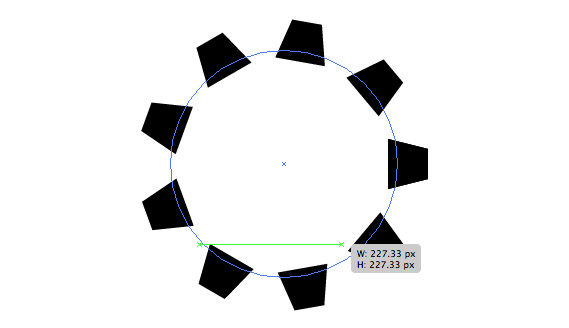
Grab the Ellipse Tool (L) and create a circle inside of the cogs like shown above.
[Use the Shift key to create a circle and the Spacebar to move around before you release the click.]
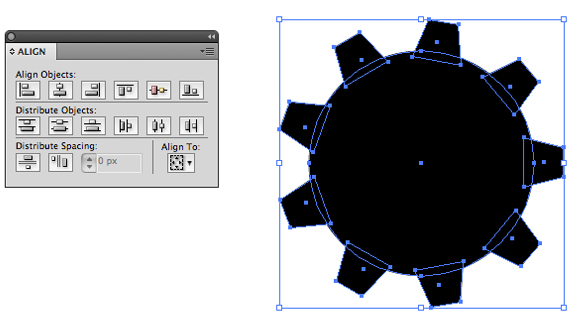
With the Selection Tool (V), select all object and align them vertically and horizontally using the Align panel. (If you can't find the Align panel, go up top in the menu and click Window > Align)
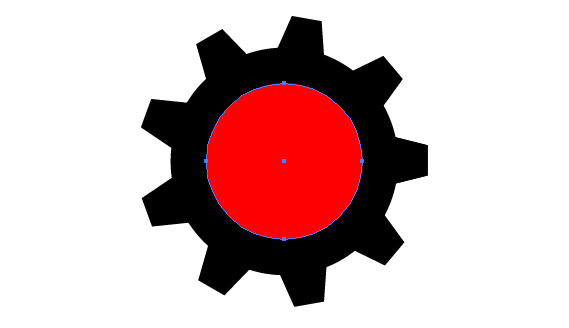
Now we need to cut-out the center of the gear: With only the circle selected, press CMD+C to copy - then CMD+F to paste in the front.
We've just copied the circle and pasted it directly in front. The new copied circle is already selected - so with the Selection Tool (V), scale down the copied circle holding Shift and Option or Alt. (Holding these keys will scale all sides of the circle keeping it centered.)
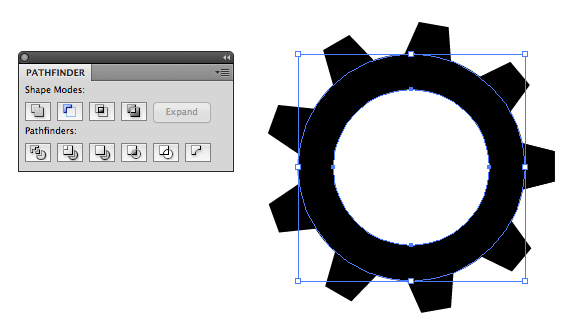
Select both circles by holding Shift and clicking, then in the Pathfinder panel - click Minus Front. (If you can't find the Pathfinder panel, do the same thing you did for Align - Window > Pathfinder)
This with "minus" the front circle with the one behind it.
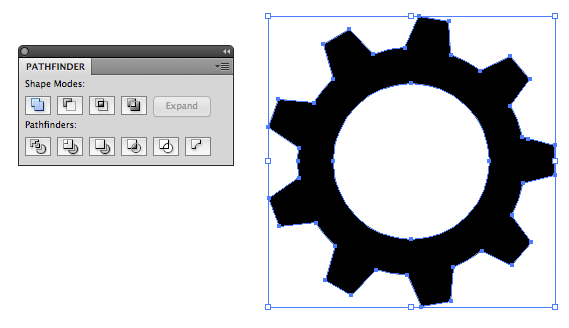
Finally select all objects and Unite them in the Pathfinder panel.
Now you have a finished vector gear! Real quick - let me show you something else you can do with your Illustrator designs...

One of my favorite things to do is perfect an illustration in Illustrator, then copy it over into Photoshop to give it some life with layer styles.
So play around and just have fun!


